Dissecting Dynamics AX Role Centers
Posted by Author, Curator, Visually Impared Squirrel Literacy Advocate & Dynamics AX Technical Solution Professional (TSP) at Microsoft on

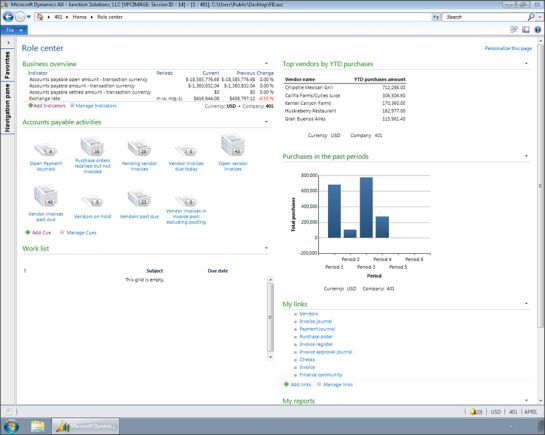
Wouldn’t it be nice to come into work in the morning, open up Dynamics AX, and see everything that you could possibly want to see in one place? It may seem like a pipe dream, but not really. Dynamics AX has a feature called the Role Center that will do this and more for you, without even breaking a sweat.
In this walkthrough we will give you an overview of the Role Centers, how you can tweak the standard ones that come out of the box, and also how you can add additional features that may make your life a little easier.
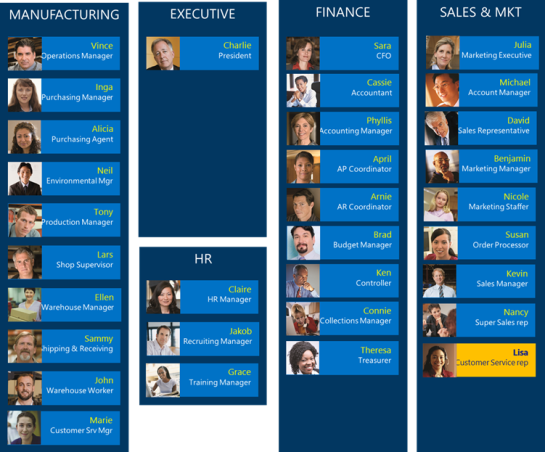
| Over 30 standard Role Centers are delivered with the standard Dynamics AX deployment, and are set up by functional role within the organization. When your user is set up in the system, it is associated with a default role, which will give you an initial Role Center view that you can then personalize. |
 |
| Accessing Your Role Center |
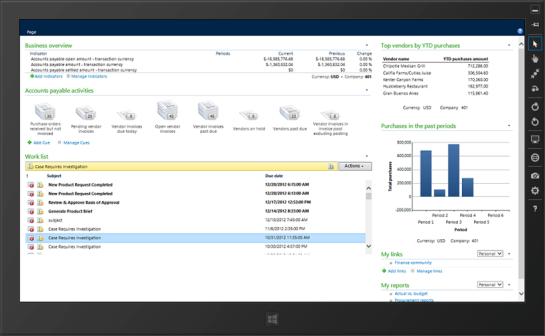
| Whenever you log into Dynamics AX, the Role Center will show up within the Home group – and will probably become the first page that you see every morning. |
 |
| If you don’t need to open up the Dynamics AX client, then you can also open the Role Center as a web page. This view will be exactly the same as the one that Shows up in the Rick Client. |
 |
| If you are more hip, and mobile, then you also have the option to open up the Role Center on your tablet of choice. |
 |
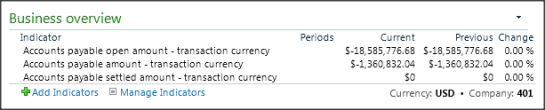
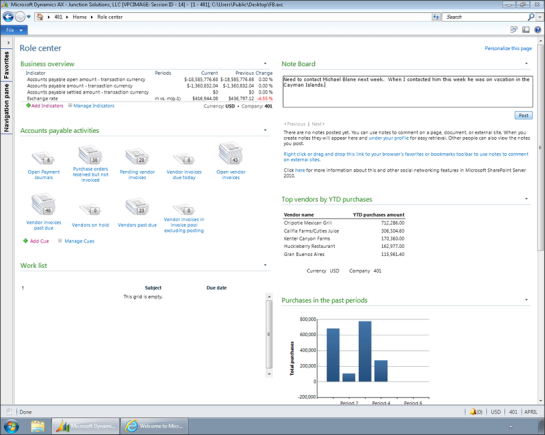
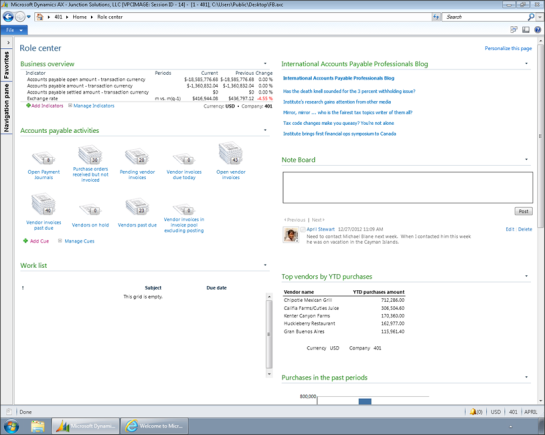
| Business Overview Indicators |
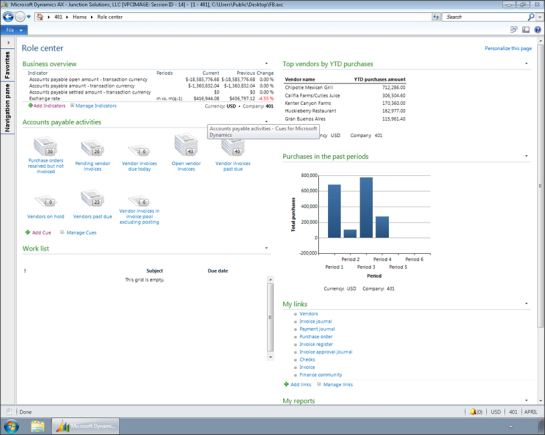
| One of the items on the Role Centers are the Business Overview panel. This shows you the key business indicators that you are interested in seeing. It starts of with a few indicators for your role, but if you click on the Add Indicators link, then you will be able to add new KPI’s. |
 |
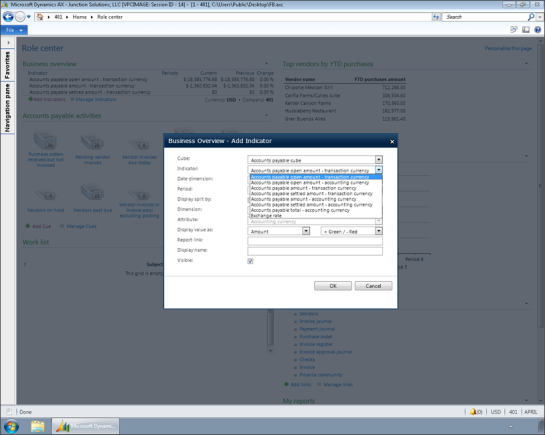
| Adding a new Business Indicator is pretty easy. |
 |
| All you need to do is select the business area that you would like to grab your data from… |
 |
| And then pick any of the KPI’s that have been associated with that module.Note: If there are KPI’s that you don’t see that you would like to see here then they may be defined through the reporting tools like PerformancePoint. |
 |
| Some of the Indicators also have selection criteria that allow you to see comparative information from other periods etc. |
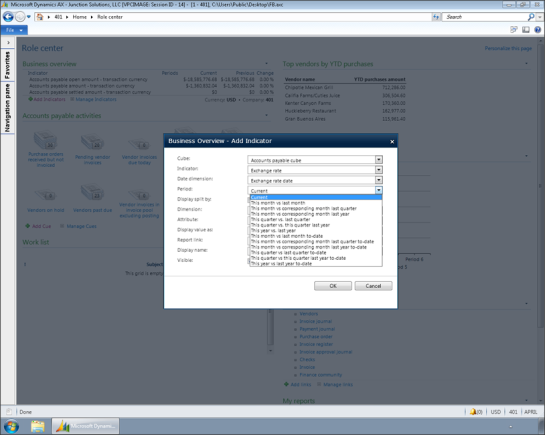 |
| Now we have a new Business Indicator defined. |
 |
| Cues |
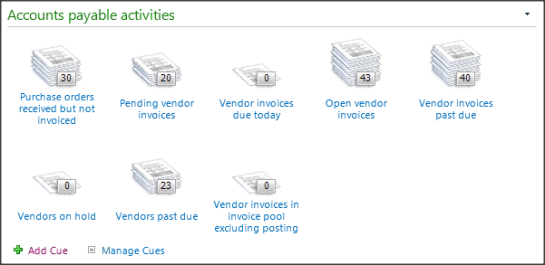
| Another great dashboard item that you should take advantage of are Cues. Cues are filters that have been defined in the system to give you a quick status check of your workload, or to give you quick access to sets of data in the system.You can add additional Cues just by clicking on the Add Cue link. |
 |
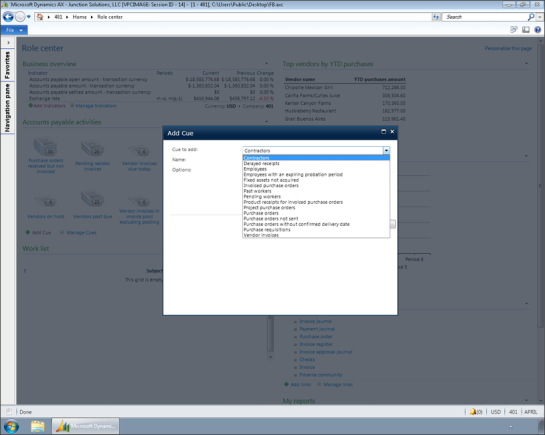
| This will show you all of the predefined searches that you may want to see. |
 |
| Although if you are not seeing the view that you really want, then all you have to do is open up a form, filter the data out to the information that you want to link to, and then from the drop down menu, select the Save As Cue option. |
 |
| Then give the Cue a name. |
 |
| The next time you open up your Role Center you will now see a visual guide to that view, and if you click on the stack, it will go straight to that filtered view for you. |
 |
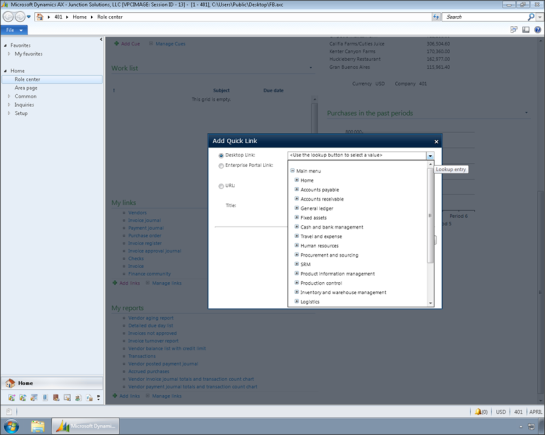
| Personal Links |
| For most people in an organization, they only access a few applications from the menu during their normal work. Why not have these links show up on your Role Center rather than go to the menu each time.The My Links panel allows you to do just that. To add new menu items to your Links, just click on the Add Links link. |
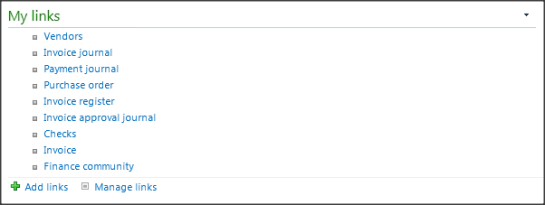 |
| Then you just need to browse to the menu item that you want to include in the menu, and add it. |
 |
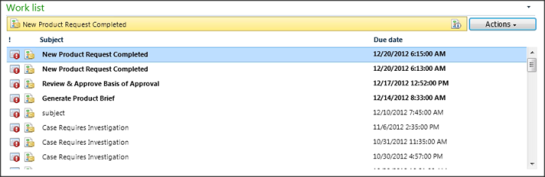
| The Workflow List |
| If you are using Workflow to manage your people processes, then all of your tasks will also show up here on the Role Center. You can act on them directly here from the Role Center, and also can access the source transactions directly from the here. |
 |
| Advanced Personalization |
| Once you have mastered the tweaking of the existing panels on your Role Center, then you may want to try adding more elements to the Role Center, and truly may it your own.To access the advanced features, just click on the Personalize This Page link at the top right of the page. |
 |
| This will change the view to the Edit Mode. You are now able to add other panels to the Role Center. You are not going to change anyone else’s Role Center by doing it, just your personal view. |
 |
| Moving Panels |
| Now that we are in the Edit mode, we can move panels anywhere on the Role Center that we like just by grabbing the title bar, and dragging it to other areas and columns. |
 |
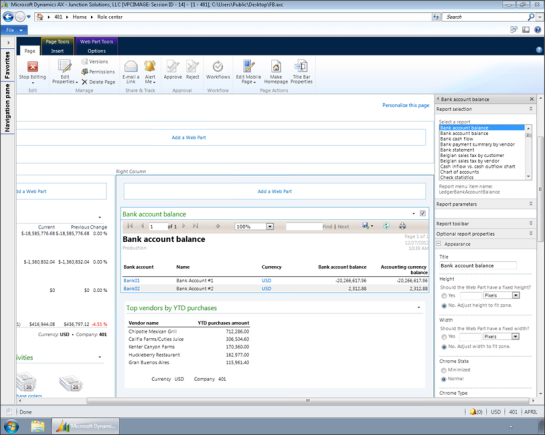
| Personalizing Charts & Graphs |
| If you want to tweak any of the panels (really called Web Parts) then you just need to access the menu through the drop down arrow on the top right of each of the panels, and select the Edit My Web Part option. |
 |
| This will pull up a properties panel on the right, with a lot more personalization options. In this case we are changing a chart, and we can see all of the different types of charts that we can view in this Web Part. |
 |
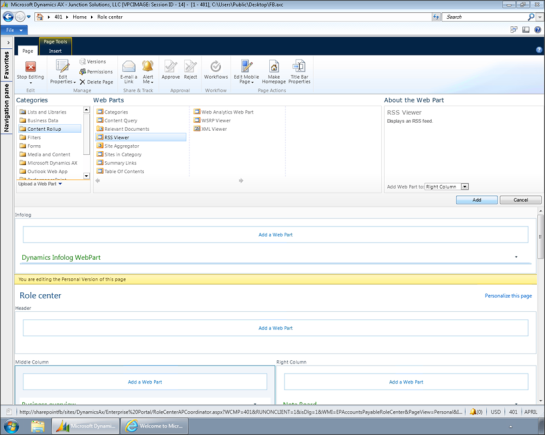
| Adding New Reports |
| If we click on any of the Add Web Part links that show up on the page then we will see a Web Part Browser with a whole slew of different elements that we can add to our Role Center. In this case we will select the Report web part. |
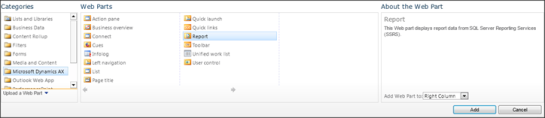 |
| Any of the published reports can now be added to our Role Center. |
 |
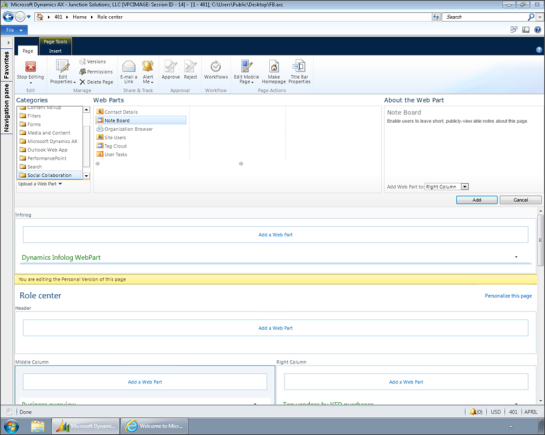
| Adding Notes & Journals |
| If we want to think outside of the AX box, then we can also add other types of information to our Role Center. For example, we can add a Note Board… |
 |
| This allows us to write notes and journals directly on our Role Center as reminders. |
 |
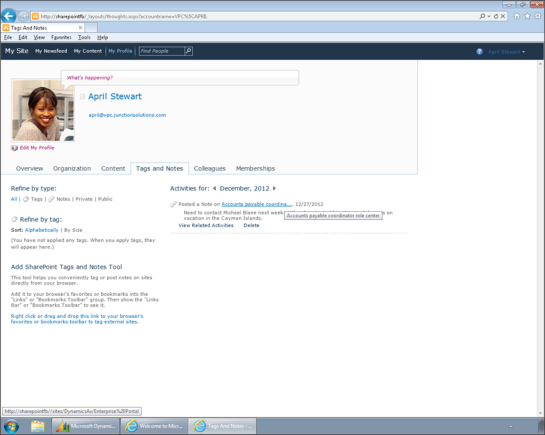
| If you are using MySites, then we can see all of our Notes, and Journals here as well. |
 |
| Adding News Feeds |
| If you are an RSS Junkie then you can add news feeds directly into the Role Center as well. To do this, we just select the RSS Viewer web part from the Content Rollup group… |
 |
| Paste in the RSS Feed URL into the properties… |
 |
| And we now have all of our favorite news articles sent directly to our desktop. |
 |
Now that’s a Role Center that I can be proud of.
Link to Original: http://sdrv.ms/12IQl2j
Share this post
- 0 comment
- Tags: Dynamics AX
0 comment